Unlock Flavor & Savings: Mastering Whole Chicken Disassembly
Transform a whole chicken into versatile cuts! Save money, enhance your skills, and make delicious stock.
Breaking Down a Bird: Mastering Whole Chicken Disassembly at Home
Buying a whole chicken is often more economical than purchasing pre-cut pieces. Beyond the cost savings, breaking down a chicken yourself provides a better understanding of the bird's anatomy, allows for greater control over portion sizes, and unlocks the potential for making flavorful homemade stock.
This comprehensive guide will walk you through the process, from essential equipment to expert techniques, ensuring you master the art of chicken disassembly.
Why Break Down a Whole Chicken?
There are several compelling reasons to learn this valuable skill:
-
Cost Savings: Whole chickens are generally cheaper per pound than individual cuts.
-
Customization: You control the size and type of cuts you get, catering to specific recipes and preferences.
-
Less Waste: Utilizing the entire bird, including the carcass, for stock minimizes waste and maximizes value.
-
Enhanced Flavor: Freshly cut chicken often tastes better than pre-packaged options.
-
Impress Your Friends (and Yourself!): It's a satisfying culinary accomplishment.
Essential Equipment
Before you begin, gather the necessary tools:
-
Sharp Chef's Knife: A good quality, sharp chef's knife is essential for clean and precise cuts. An 8-inch or 10-inch blade is ideal.
-
Kitchen Shears (Optional): Heavy-duty kitchen shears can be helpful for cutting through cartilage and smaller bones.
-
Cutting Board: A large, stable cutting board provides a safe and ample workspace. Opt for a non-slip surface.
-
Boning Knife (Optional): A flexible boning knife can be useful for removing meat from the bones, especially for deboning the thighs.
-
Clean Towels or Paper Towels: Keep your hands and workspace clean to prevent cross-contamination.
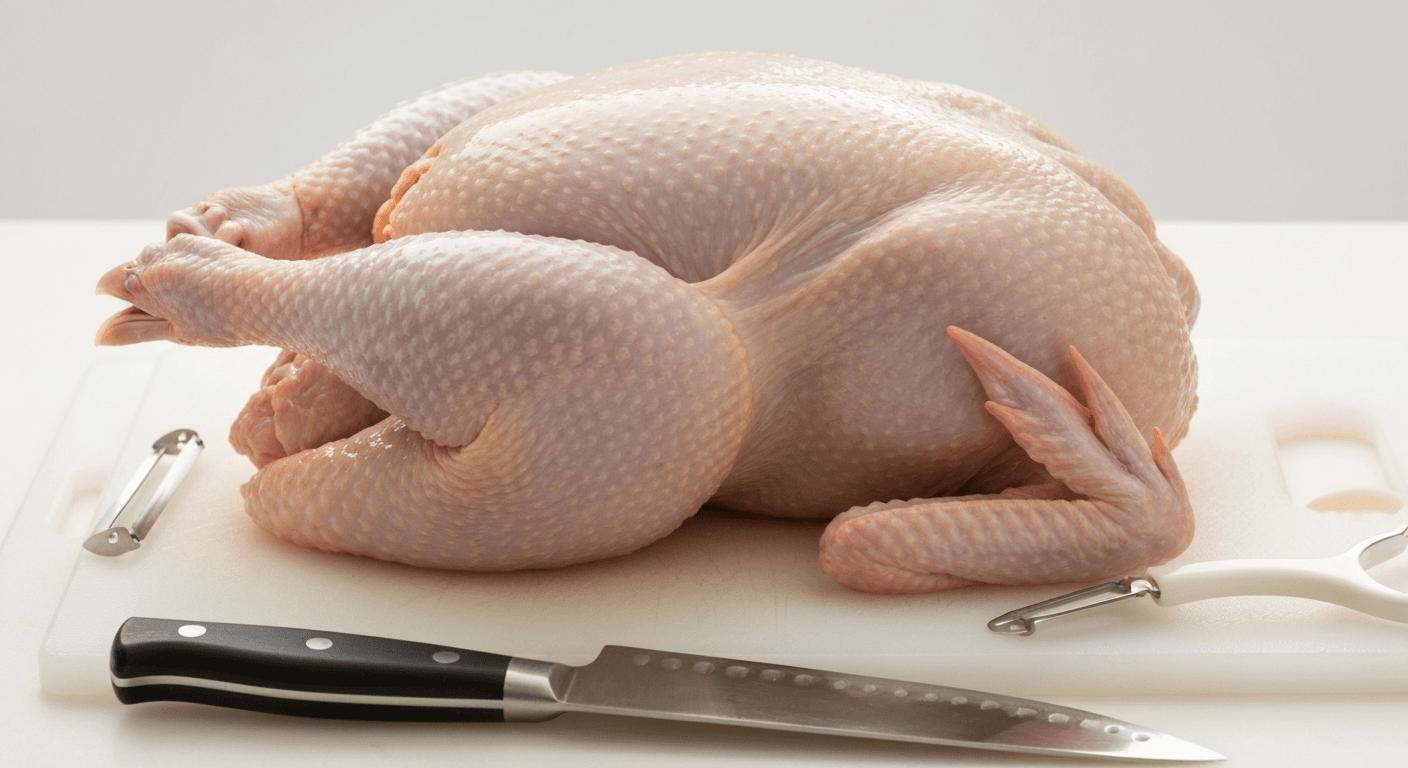
Preparing Your Chicken
-
Thawing: If your chicken is frozen, thaw it completely in the refrigerator. This can take 24-48 hours, depending on the size of the bird. Never thaw chicken at room temperature.
-
Rinsing (Optional): Some chefs recommend rinsing the chicken under cold water and patting it dry with paper towels. This is a matter of personal preference. However, be mindful of potential cross-contamination when rinsing raw poultry.
-
Workspace: Ensure you have a clean and spacious workspace.
Step-by-Step Guide to Disassembling a Chicken
Follow these steps to efficiently break down your whole chicken:
1. Remove the Legs:
-
Place the chicken breast-side up on your cutting board.
-
Pull one leg away from the body. You should feel the joint connecting the leg to the carcass.
-
Using your knife, cut through the skin and meat along the thigh, following the natural line where the leg meets the body.
-
Locate the joint connecting the leg to the carcass. It may be easier to bend the leg backward to expose the joint.
-
Cut through the joint to detach the leg completely. Repeat on the other side.
2. Separate the Drumstick and Thigh:
-
Locate the joint connecting the drumstick and thigh.
-
Place the leg skin-side down on the cutting board.
-
Cut through the skin and meat around the joint.
-
Bend the leg to expose the joint and cut through it to separate the drumstick and thigh.
3. Remove the Wings:
-
Pull one wing away from the body.
-
Locate the joint connecting the wing to the breast.
-
Cut through the skin and meat around the joint.
-
Bend the wing backward to expose the joint and cut through it to detach the wing. Repeat on the other side.
4. Separate the Wing Tip (Optional):
-
The wing tip contains very little meat. You can remove it and save it for stock.
-
Locate the joint connecting the wing tip to the rest of the wing.
-
Cut through the joint to detach the wing tip.
5. Remove the Breast:
-
Locate the breastbone (keel bone) running down the center of the breast.
-
Using your knife, cut along one side of the breastbone, following the contour of the rib cage. Angle your knife slightly downward to remove as much breast meat as possible.
-
Continue cutting until you reach the wishbone.
-
Use your fingers to loosen the breast meat from the rib cage.
-
Carefully cut the breast meat away from the carcass, detaching it completely.
-
Repeat on the other side.
6. Separate the Tenderloins (Optional):
-
The tenderloins are small, delicate strips of meat located on the underside of each breast.
-
Gently peel the tenderloins away from the breast meat.
7. Carcass for Stock:
- Don't discard the carcass! It's perfect for making flavorful chicken stock.
Tips for Success
-
Sharp Knife is Key: A dull knife is dangerous and makes the process much more difficult. Keep your knife sharp!
-
Locate the Joints: Identifying the joints is crucial for clean cuts and minimizing bone fragments.
-
Use Firm Pressure: Apply firm, even pressure when cutting through skin and meat.
-
Don't Be Afraid to Use Your Hands: Use your hands to feel for the joints and guide your knife.
-
Start Slow: Take your time and focus on accuracy, especially when you're first learning.
-
Practice Makes Perfect: The more you break down chickens, the faster and more efficient you'll become.
-
Safety First: Always keep your fingers away from the blade and use a stable cutting board.
Common Mistakes to Avoid
-
Using a Dull Knife: A dull knife can slip and cause injury.
-
Cutting Through Bones: Avoid sawing through bones, as this can create bone fragments in your meat. Aim for the joints.
-
Rushing the Process: Take your time and focus on accuracy.
-
Not Identifying the Joints: Failing to locate the joints can result in uneven cuts and wasted meat.
-
Poor Knife Handling: Practice proper knife handling techniques to ensure safety and efficiency.
Making Chicken Stock
Now that you've broken down your chicken, don't let the carcass go to waste! Use it to make delicious and nutritious chicken stock.
Ingredients:
- Chicken Carcass
- 8-10 cups Cold Water
- 1 Onion, roughly chopped
- 2 Carrots, roughly chopped
- 2 Celery Stalks, roughly chopped
- 2-3 Bay Leaves
- 1 tsp Black Peppercorns
- Optional: Herbs like thyme, parsley stems, or rosemary
Instructions:
-
Place the chicken carcass in a large stockpot.
-
Add the vegetables, bay leaves, and peppercorns.
-
Cover with cold water.
-
Bring to a boil, then reduce heat to a simmer.
-
Simmer for at least 2-3 hours, or up to 4 hours, skimming off any foam or impurities that rise to the surface.
-
Strain the stock through a fine-mesh sieve lined with cheesecloth.
-
Let the stock cool completely.
-
Store in the refrigerator for up to 4 days or freeze for longer storage.
Tips for Stock Making:
-
Cold Water: Starting with cold water helps to extract more flavor from the bones and vegetables.
-
Simmer, Don't Boil: Boiling can make the stock cloudy. Simmering gently extracts the flavors without clouding the liquid.
-
Skimming: Skimming off the foam and impurities results in a cleaner, clearer stock.
-
Don't Overcook: Overcooking can make the stock bitter.
-
Seasoning: You can add salt and pepper to taste, but it's best to wait until the end of the cooking process.
Beyond the Basics: Deboning Chicken Thighs
For dishes like chicken rolls or stuffed chicken, you might want to debone the thighs. Here's how:
-
Place the thigh skin-side down on your cutting board.
-
Use a boning knife or a sharp paring knife to carefully cut along the bone, separating the meat from the bone.
-
Work your way around the bone, using your fingers to help loosen the meat.
-
Once the bone is completely detached, remove it.
Storage and Safety
-
Store raw chicken pieces in the refrigerator for up to 2 days.
-
Freeze raw chicken pieces for up to 9 months.
-
Store cooked chicken in the refrigerator for up to 4 days.
-
Always wash your hands thoroughly with soap and water after handling raw chicken.
-
Use separate cutting boards and utensils for raw chicken and other foods.
Conclusion
Breaking down a whole chicken at home is a rewarding skill that saves money, reduces waste, and enhances your culinary abilities. With a little practice and the right tools, you'll be disassembling chickens like a pro in no time. Enjoy the delicious and versatile cuts, and don't forget to make flavorful stock from the carcass!